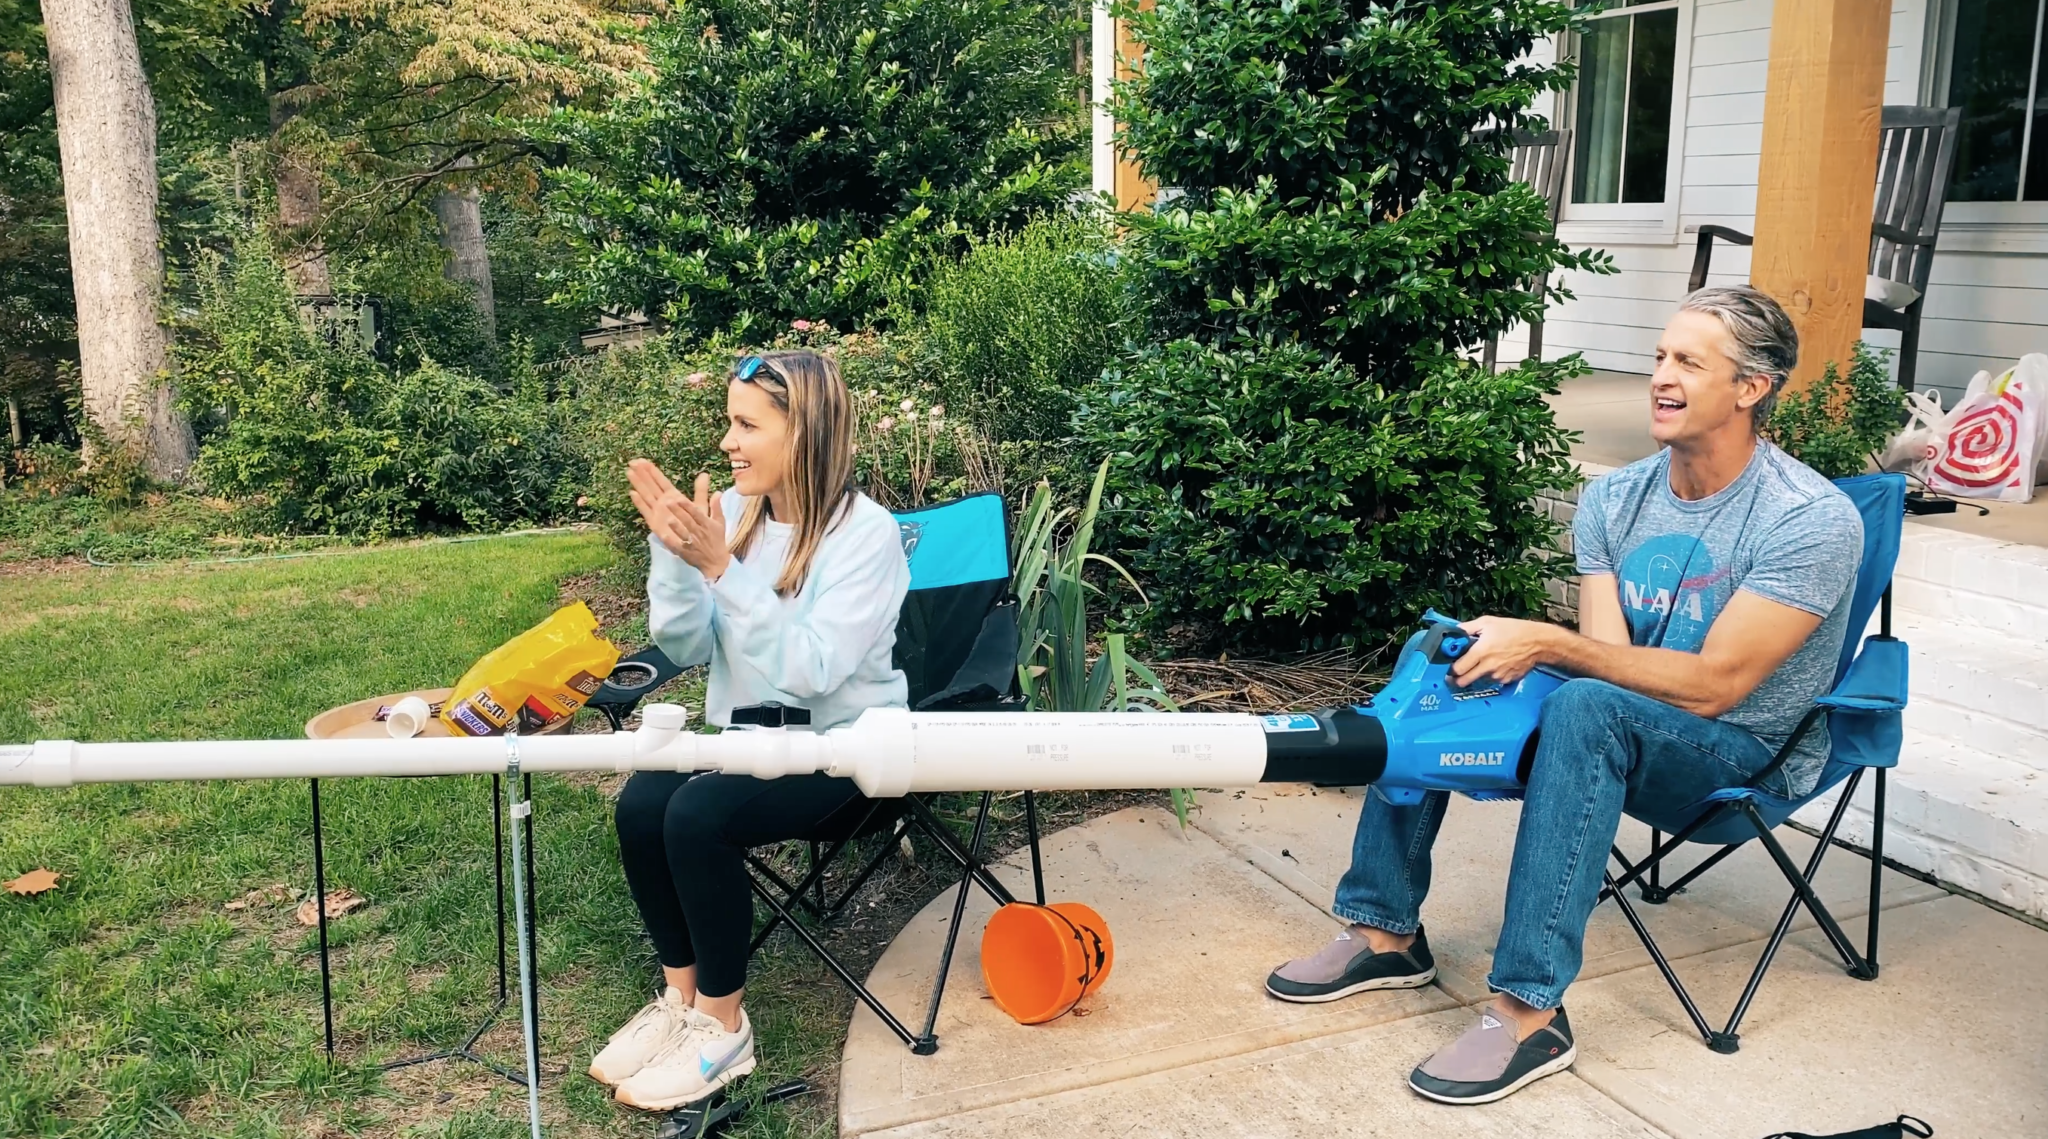
Let’s face it, Halloween is going to be different this year. After our kids have endured so much, it breaks my heart to think Halloween is going to be taken from them too. While we don’t know exactly what it is going to look like, we do want to make sure we keep everyone safe. So we came up with a way to have some fun with social distancing… enter the candy launcher.
This afternoon project will definitely make you feel like Tim Taylor from Home Improvement, especially once you get your leaf blower cranking. Our special expert, Steve, also says you can make a version with an air compressor to really launch those candy bars. Here is how you make your own candy launcher.
DIY Candy Launcher
Materials
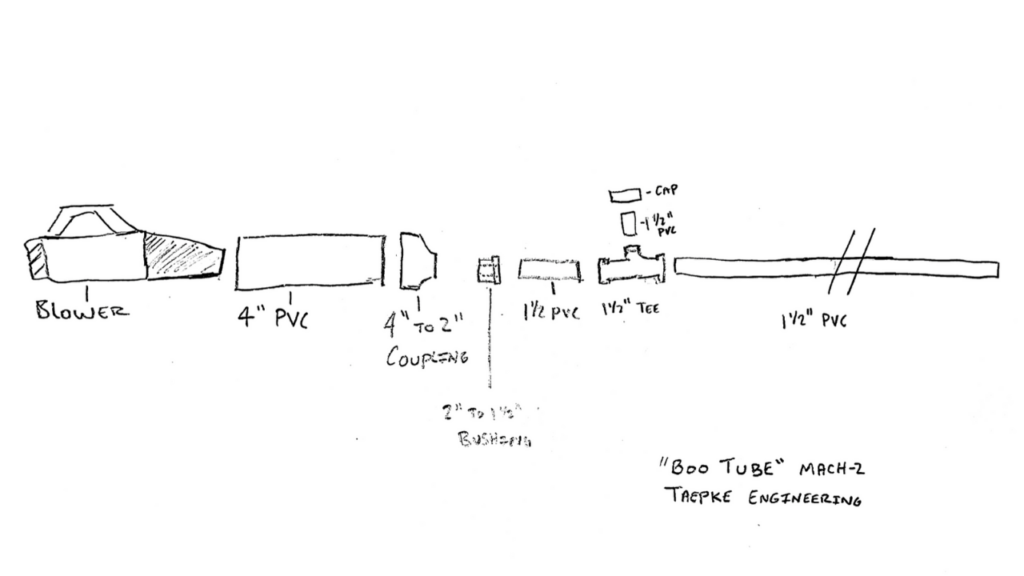
- 4″ PVC
- 4” to 2″ coupling
- 2″ to 11/2″ Bushing
- 11/2” Pipe (10 ft)
- 11/2″ Tee
- Cap
- Cement
- 3/8” Rods (3 feet or 6 feet)
- 1 1/2” Split ring
- Blower – you could really use any blower, for ideal results, need at least 450 CFM (cubic feet per minute) and 110 MPH. More CFM/MPH = more velocity = more power.
- Pipe clutter
Steps for Assembly (Be sure to dry fit before gluing!)
- Glue 4” to 2” coupling onto 4” PVC pipe
- Clue 2” to 1 1/2” bushing to coupling on 4” PVC pipe
- Cut approx 4 inches of 1/12” PVC. Glue into bushing.
- Glue 1 1/2” Tee to end of existing assembly.
- Cut another 3 inches of 1/12” PVC. Glue cap onto pipe. Set aside.
- Glue remainder or desired length to end of TEE.
- Place rods in ascending or descending order to provide support and direct trajectory. Screw pipe supports onto rods.
- Place blower into 4” PVC
- Load fun size candy (M&M’s, left Twix, and snickers flew the furthest)
- Launch away!

**Be safe launching near roads, in the dark, or in close proximity to people!**
If you try this yourself, please send us a photo or a video! What ways are you going to hand out candy this Halloween?


